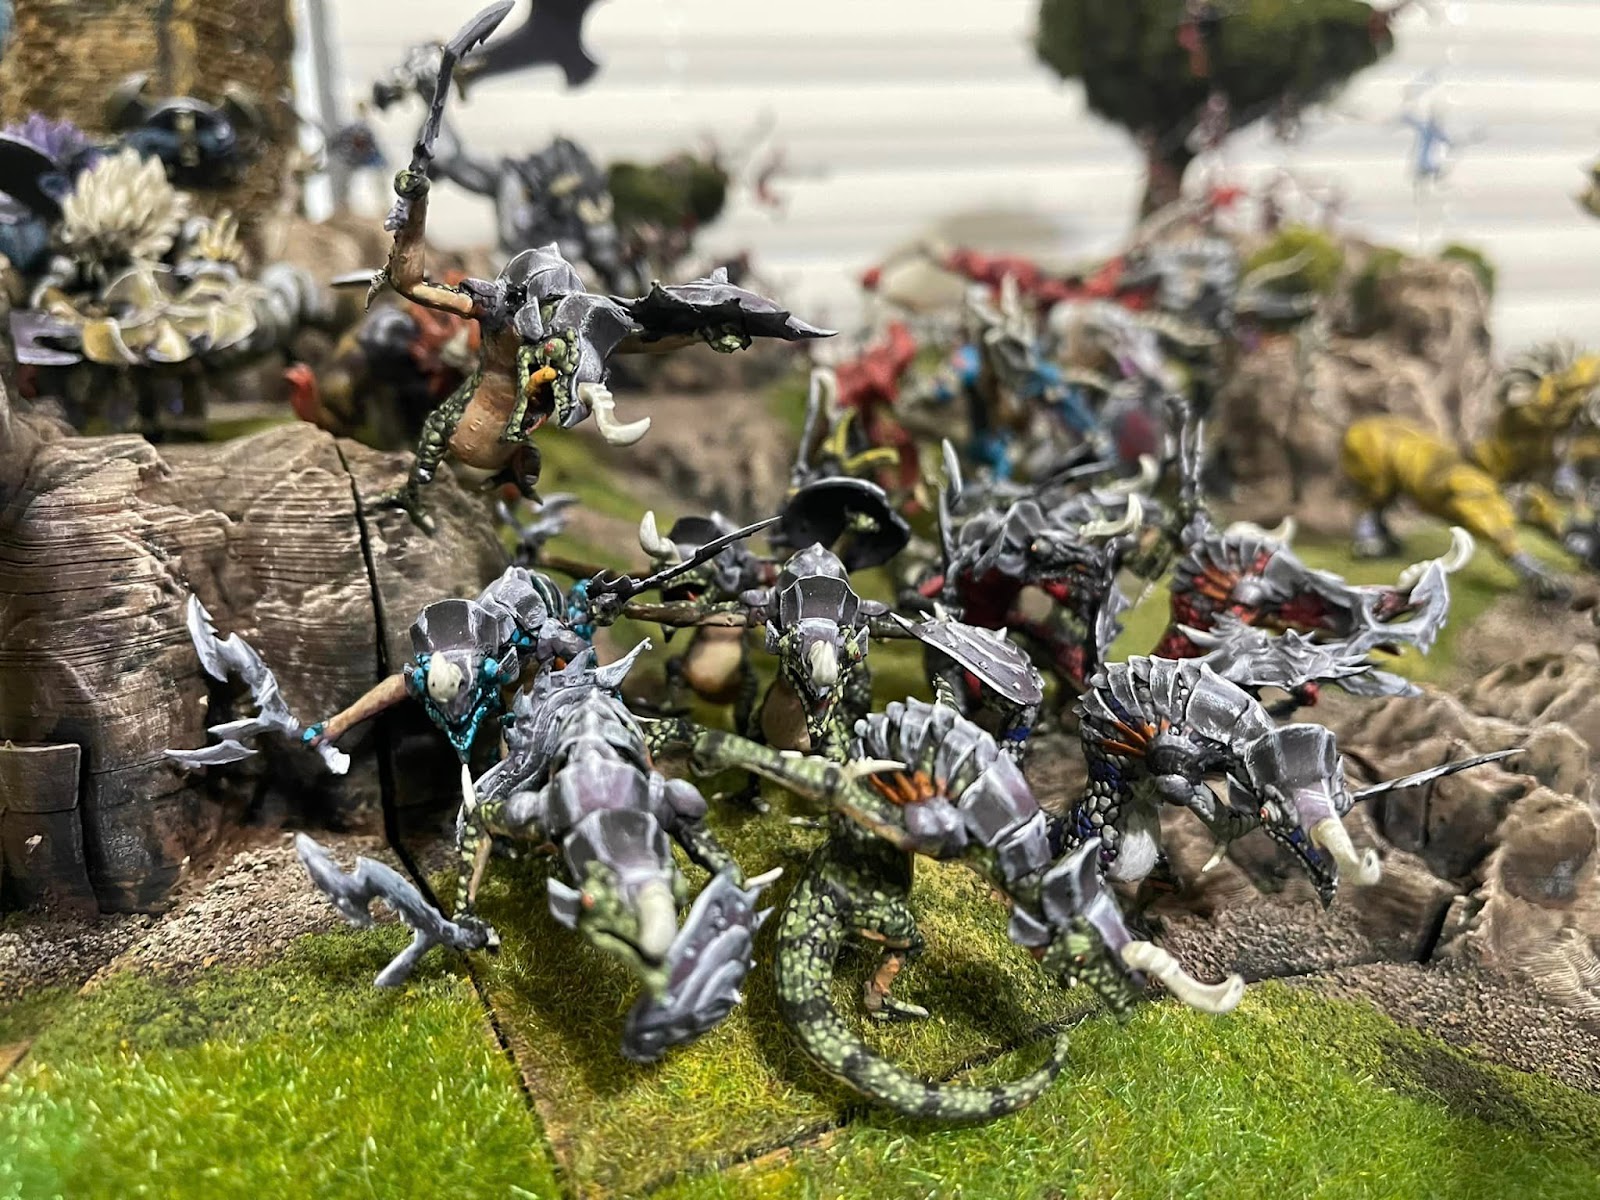
At Lone Wolf GT in April of 2023, I unveiled an army that I thought was going to become one of my trademark armies. I ripped the game resources from Breath of the Wild, converted them from the low polygon, shader-detail heavy resources the game used into detailed miniatures, printed them, and painted them. Along the way, I learned a lot about 3d sculpting, how shaders work, and possibly why I'm a bit crazy.
How did I do this?
First, some backstory
In 2017, I first played a little game for the Nintendo Switch called The Legend of Zelda: Breath of the Wild. As a big fan of exploration games, it made a lot of sense for me dive in. It was one of the only games my kids would watch me play without wanting to themselves (though that would change), and was a way for the family to bond. About two years later, when I finished my 100% run of it, one of them suggested that Breath of the Wild would make a cool army theme. I agreed, and just tucked it away into the back of my mind. There it sat, while I did Abyssals, and Trident Realms... and then Covid happened. I impulse bought my first 3D printer, a Creality Ender 3, so that I could print terrain for the Alamo GT. A few months later, I bought an ePax E10, nominally to print trophies for the tournament, but in truth, because I had picked my 2021 army - I was going to bring Breath of the Wild off the platform and onto the tabletop.
Creating the Models
Getting the game resources
"This will be simple," I thought. "I'll just grab the files from an emulator, print them, and it'll all be good!"
I was mistaken, in so many ways. First, Breath of the Wild emulation wouldn't give me the resources I wanted; those had to come from the Wii U version of the game, which was on a DVD that could be cracked. I found
the Models Resource site, which is a repository for game resources across a lot of platforms. At the time, the resources available for BotW were limited - some of the monsters were on there, but others that I wanted to use were not present.
Once I got the first of these downloaded and loaded it into Blender, I was dismayed - the format didn't support any of the object files that Blender could import. Time for research! Eventually, I found a plugin that would allow me to import the files, but the models were low-polygon, and were not even manifold (this means a printer wouldn't know which parts were the inside or outside.
 |
| The Lizalfos model, imported from the game |
They'd look... OK, I guess, printed. But they wouldn't look good. I wanted this army to amaze and impress everyone who saw it! The first step was to clean up the manifold issue. Vertex by vertex, I went through each model and made sure they were connected. The arms, for example, had up to eight vertices layered on top of each other. Nothing was connected. Nothing had to be - in the game, the shaders could calculate vertices that share space without a problem. To a 3d printer though, each of them was an extra place that would have to be printed, and even gaps of 1/1000th of a millimeter could cause the printer to fail.
 |
| Cleaning up the vertices around the arm joints |
Upscaling the Model and adding detail
Once the model was manifold and all the vertices were connected, I scaled the model up. This was done by subdividing each "face" (the triangular shapes) repeatedly, so instead of one triangle, I had dozens.
I then used Blender's Sculpting tool to Smooth out the vertices, changing them from rough, triangulated chaos into at least a smooth texture that would look good when printed.
 |
| Look at all those polygons! |
The next print looked good, but still lacked the detail I wanted for painting. The obvious solution - digitally sculpt all the detail into the model! Lizalfos have scales, so scale by scale, line by line, I carved furrows into the model. I printed again! What looked good on screen was too shallow to even come across on the printer.
 |
| It looked so good on screen |
Discouraged, I took a break. It was now February of 2022. I was not going to be able to get the army finished by Lone Wolf, and I frantically built a dragon-themed Basilean army to make the 2022 tournament season. I took a few months off, thinking the idea was just going to fall apart.
In June, I felt I'd rested enough, and dove back into the Lizalfos model. I gave up on sculpting the arms and head separately, and resigned myself to having single posed models instead of miniature-style components that could be glued together to customize them. More importantly, I overexaggerated the detail I used to sculpt the models. The delicate scales turned into deep channels carved into the model. Edges were hardened instead of rounded, to give the printer higher fidelity to the resolution. Claws, teeth, and horns became over-exaggerated, to let the detail shine through.
 |
| Finally, the model that printed matched what was on screen! |
More importantly, it looked good when it was printed. Now, how could I make it look like the monsters in the game?
Rigging
Thus far, I'd only worked with the models in what are called their "T-poses" - the default pose that models are imported into the game with. The DAE files that I had imported had no rigging - either the person that ripped them from the game neglected to include it, or they were corrupted in the import process.
I experimented a bunch, and figured out how to create 'bones', and link them together. I figured out how to make sure the model jointed at the correct locations for the bones. I raged over details like the tongue on the Lizalfos, which in the original model stuck out of the front of the head. The elbow spines didn't want to follow the elbow joints. Teeth on top of the model would stick to the bottom jaw instead of the top, leading to spaghetti-nightmare mouths. Shoulders wouldn't spin when the spine was rotated, leaving arms behind.
 |
| The ball-and-pyramid shapes are the 'bones' that I would use to pose the model |
By September, I had my first pose done. It was basic. It was simple, and it looked just like a screenshot from the game.
 |
| My pose versus one in the game (thanks to Croton for the stream) |
Now that I had one, I needed others! I decided early on that I didn't want to repeat poses. Except for the Yiga footsoldiers (seriously, how many ways can you pose an archer?), there are no repeated poses in the army. Every model is unique. Along the way, I sculpted weapons - everything from Savage Lynel clubs and Demon Carvers to Mops and Boko Bats.
 |
| "Would you say I have a 'plethora' of weapons, jefe?" |
With the models posed, I then had to get them in scale, both relative to each other, and with other Kings of War models. I printed a sample of each of the units and put them next to a few Kings of War models, to see if they fit. I also found a reference document to average model sizes in Breath of the Wild, so once I had one human-sized thing scaled, it was easy to scale all the others relative to that one.
 |
| Scale test of the three infantry types next to a Basilean Abbess and the Grokagamok model I'm always going to threaten to paint, and then never actually paint |
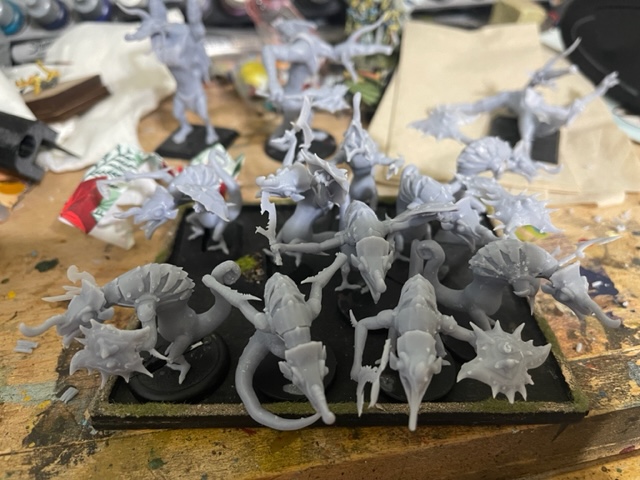
In mid-December, I started printing the models that were posed, and finished the units that didn't have all their poses done. I managed to churn out the whole army in six weeks of solid printing.
The army was printed - now it needed to be painted!
 |
| About half the army (as much as I could fit on my desk) waiting on paint |
Painting
Breath of the Wild, like its predecessor The Wind Waker, used cell-shading to animate the characters. The characters are rendered in one color, with a shade tone thrown in, and an edge highlight that gives the model depth. There are no transitions between these three layers - that's what makes the characters in the Wind Waker (and Breath of the Wild) look so cartoony.
 |
| A bokoblin from Breath of the Wild. Note the single dark color for shadow, and yellow highlight at the top of the head. |
Initially, I tried that in a model form... and it failed. Cel-shading using a computer shader is easy, as you know where the observer is relative to the model, On a curve, you can do the highlight at the very edge of the polygon, because you're calculating where that is relative to the viewport. For a physical model... that doesn't work. The observer can move around relative to the model, or crouch down, or loom over it.
 |
Scale test and cel-shading (skin tone) protoype. The first draft did not work.
|
Instead, to replicate the cel-shading without forcing the viewer to stand at a specific angle, I restricted myself to the three colors that are used in cel-shading: a base coat, a higlight, and a shadow. Unlike most of my other paint jobs, I deliberately removed the transitions I put into my models. I went sparing on the highlights, and used brush strokes within it to convey texture on surfaces like the lynel's beards and the bokoblin's skin.
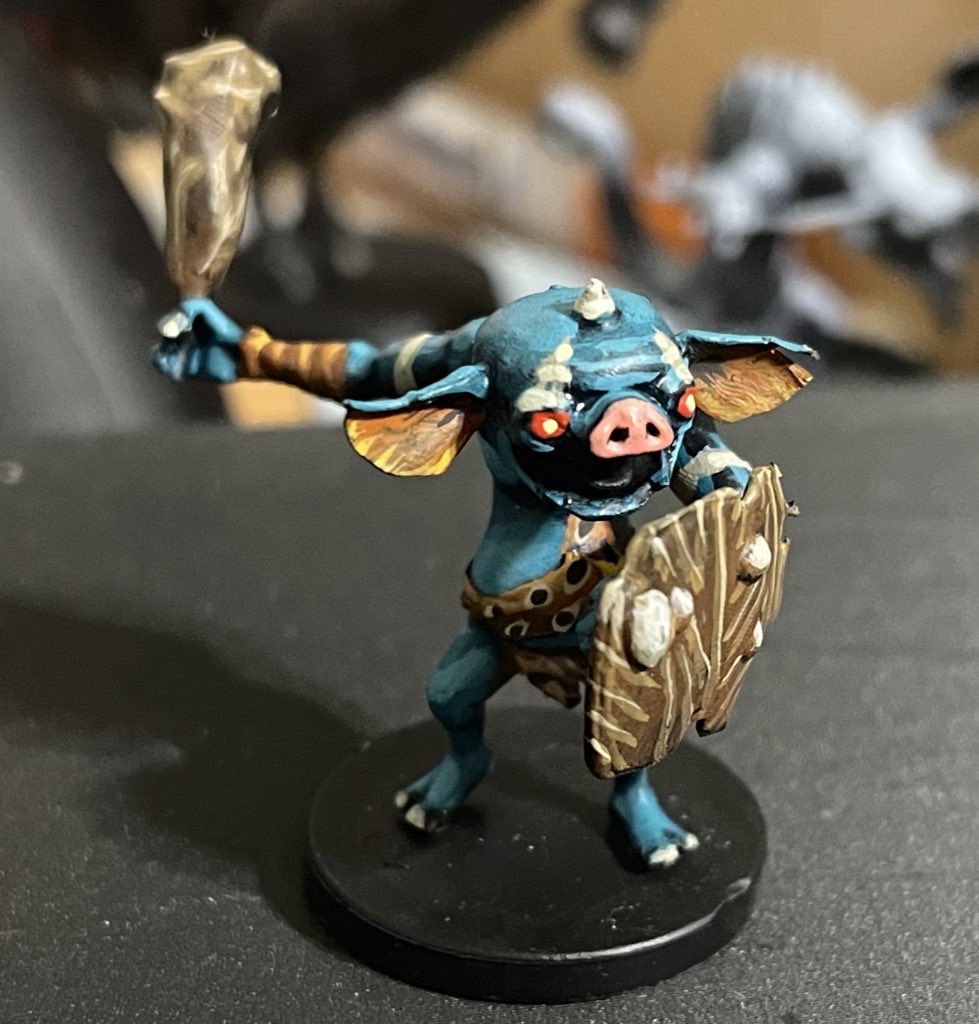 |
| The second, three-color attempt cel-shading worked much better. |
I did a couple of test models, to make sure that I had the colors matched as closely as I could, and then I dived in. It was now mid-February, and I had seven weeks to take the army from printed to completed.
I started with the Yiga, because infantry are the least exciting to paint. In a week, I had painted both squadrons of archers, and started on the Bokoblins.
 |
| Yiga assembly line! |
The next week saw me finish the Bokoblins and the Moblins. The Lizalfos followed in week three, with the Lynels (both the horde and the two characters) and regiment of snow foxes done in week four. In week five, I finished the Hinox and characters, and started finishing the display board.
When painting the models, I prefer to base each one individually and work them a unit at a time. My painting process is documented in other places in this blog. For the most part, I start with the skintones, then move up in depth on the model - clothes, things on top of clothes, and weapons last of all.
 |
| The moblins - painted but not based! |
For the metallics in the army, I eschewed the no-transition painting and wet blended them together with my typical non-metallic technique. While it sacrificed the consistent aesthetic of painting 100% of the model the same way, it also allowed me to give a reflective edge to the metals that mirror the reflection metals have in Breath of the Wild - without the ability to capture reflected light, clean transitions on the three shades I used for the non-metallics. I did restrain myself to the three shade restriction, so all the metallic comes in a base color, a dark, and a light. There are white edge highlights on top of that highlight, but that's expected with non-metallics.
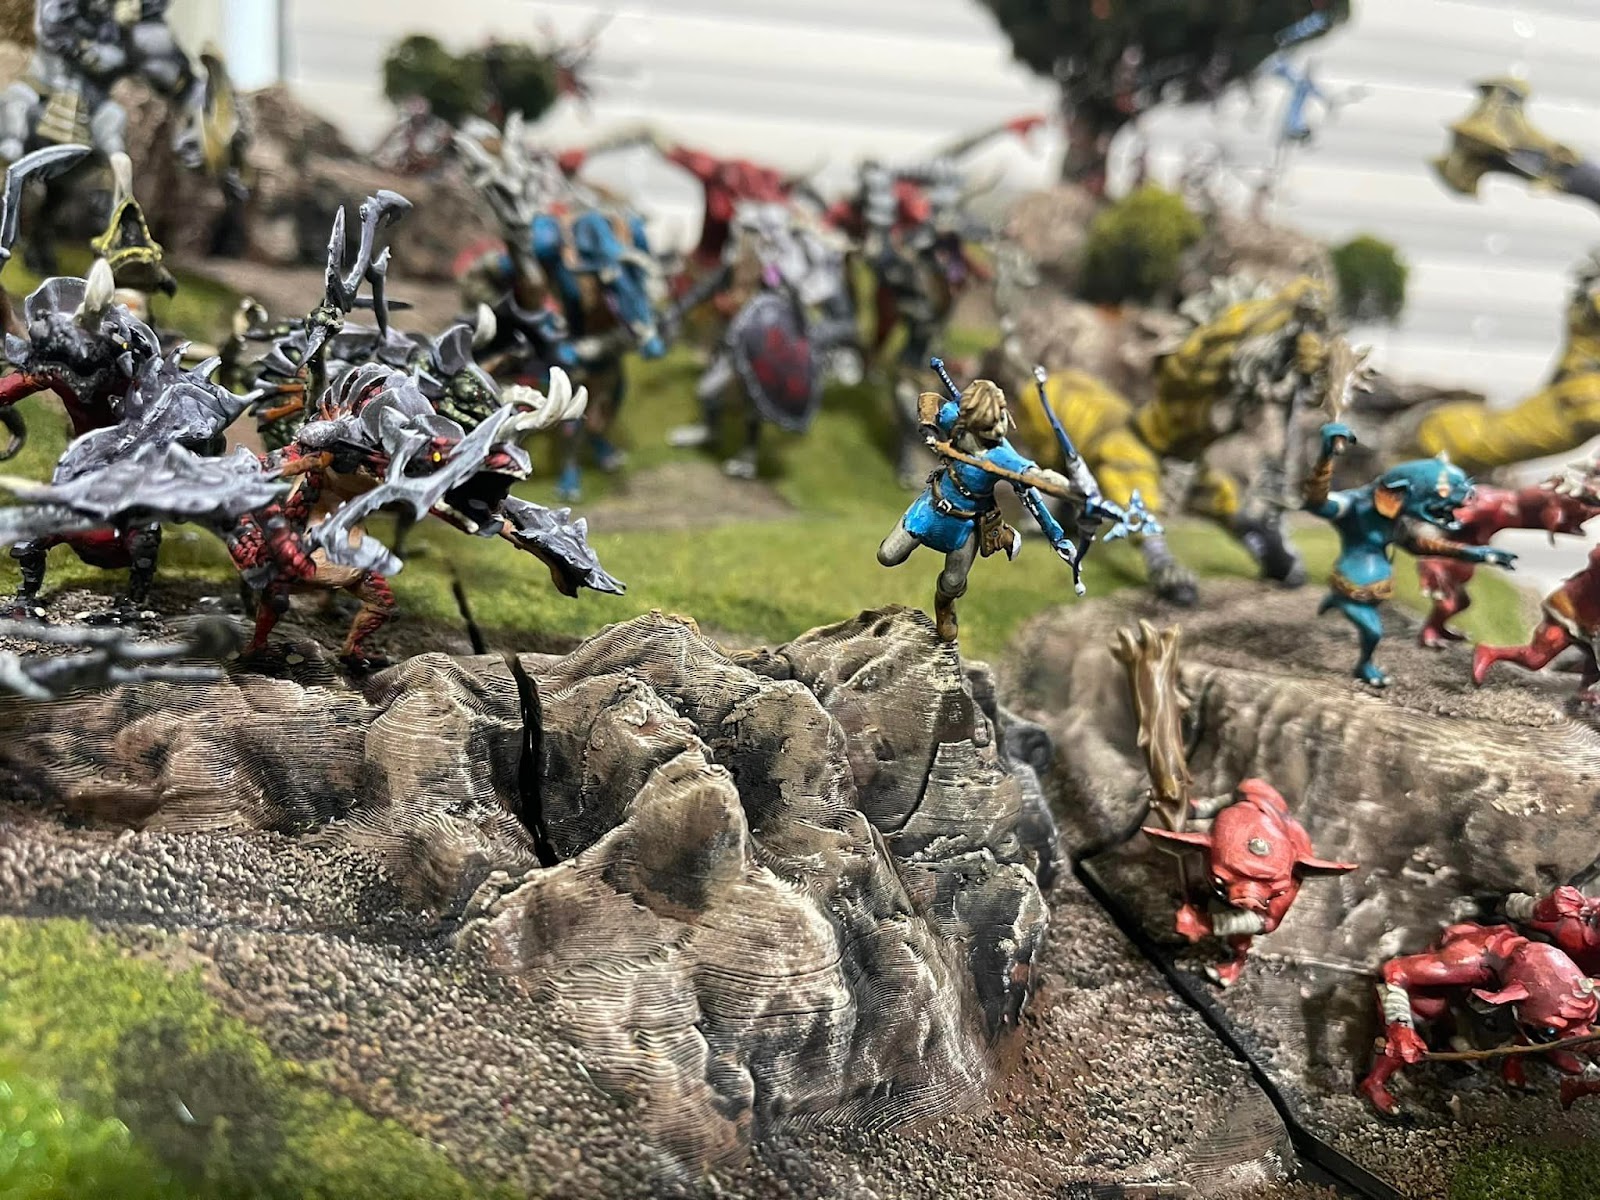
Display Board/Basing
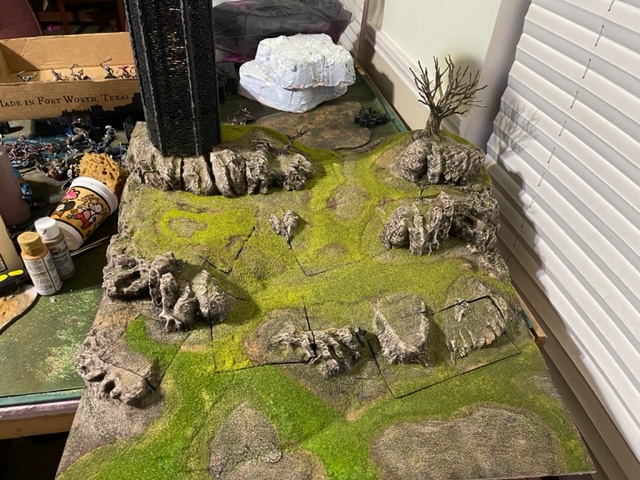
While I was printing the army, I was also 3d sculpting the bases that would be used for it. I've always been fascinated by seamless basing, and it features in almost all of my armies since we transitioned to Kings of War. For this, I used some publicly available hills, and made a big pile of them. Once I was satisfied with the arrangement, I combined the individual elements; manually merging each border vertex together so they would appear as a single piece. |
| The digital render of the display board |
The board created, I then started adding large rectangles in Blender to mark where each unit would go. To get them to fit inside each other, I made two rectangles: one the size of the unit (100mm x 80mm for an infantry regiment), and then a second one to represent what I would cut out of the display board, usually 2-3 mm wider than the regiment (so 103mm x 83mm). This would allow for the elephant foot I was getting on some of my bases, and let the models slide in and out without getting stuck. The "inner" one was exported to its own file to be the base, while an updated version of each hill layer was saved with the "outer" version ripped out of it.
 |
| The board with the base rectangles in place |
The display board and bases took four weeks to print. The board itself was printed in nine massive sections, sliced apart and glued together. The seams were filled with spackle and smoothed down so they would not be visible. The combined board was finally glued down to a 2'x2' board for rigidity.
 |
The nine squares put together, with bases in place
|
 |
| The underside of the nine tiles |
As the board was drying, I started pinning models to the bases. This allowed me to make sure that everything I'd printed could fit, but also ensure that they could stand on the board without bumping into other units.
 |
| Lizalfos getting pinned to their base. |
 |
| Half the bokoblins placed with pins |
Once the board was dried, I applied sand and let it dry. The non-sand portions were then stippled with three different shades of brown, to give a dirt pattern that would be slightly visible under the grass. The sand-flocked portions and the rocks were painted with a different three shades, to differentiate the rocks from the dirt.
 |
| The board with sand added and painted |
Static grass flock was then added to give the grassland texture. Three shades of Fine Turf from Woodland scenics were used, to give variety to the short grass. I then used a static grass applicator with a two-tone mix of static grass for the longer portions of grass. I don't think there are any rupees hidden in them, though.
 |
| The board with grass added |
Finally, the models were glued to the bases.
 |
| The board, showing empty slots where the bases are not in place |
For the trees, I used a material called polyfiber, which is glued to the tree armatures using hair spray. The polyfiber is then filled with hair spray, and Fine Turf is sprinkled on top. Another layer of hair spray then acts as a laquer and holds the poly fiber in place.
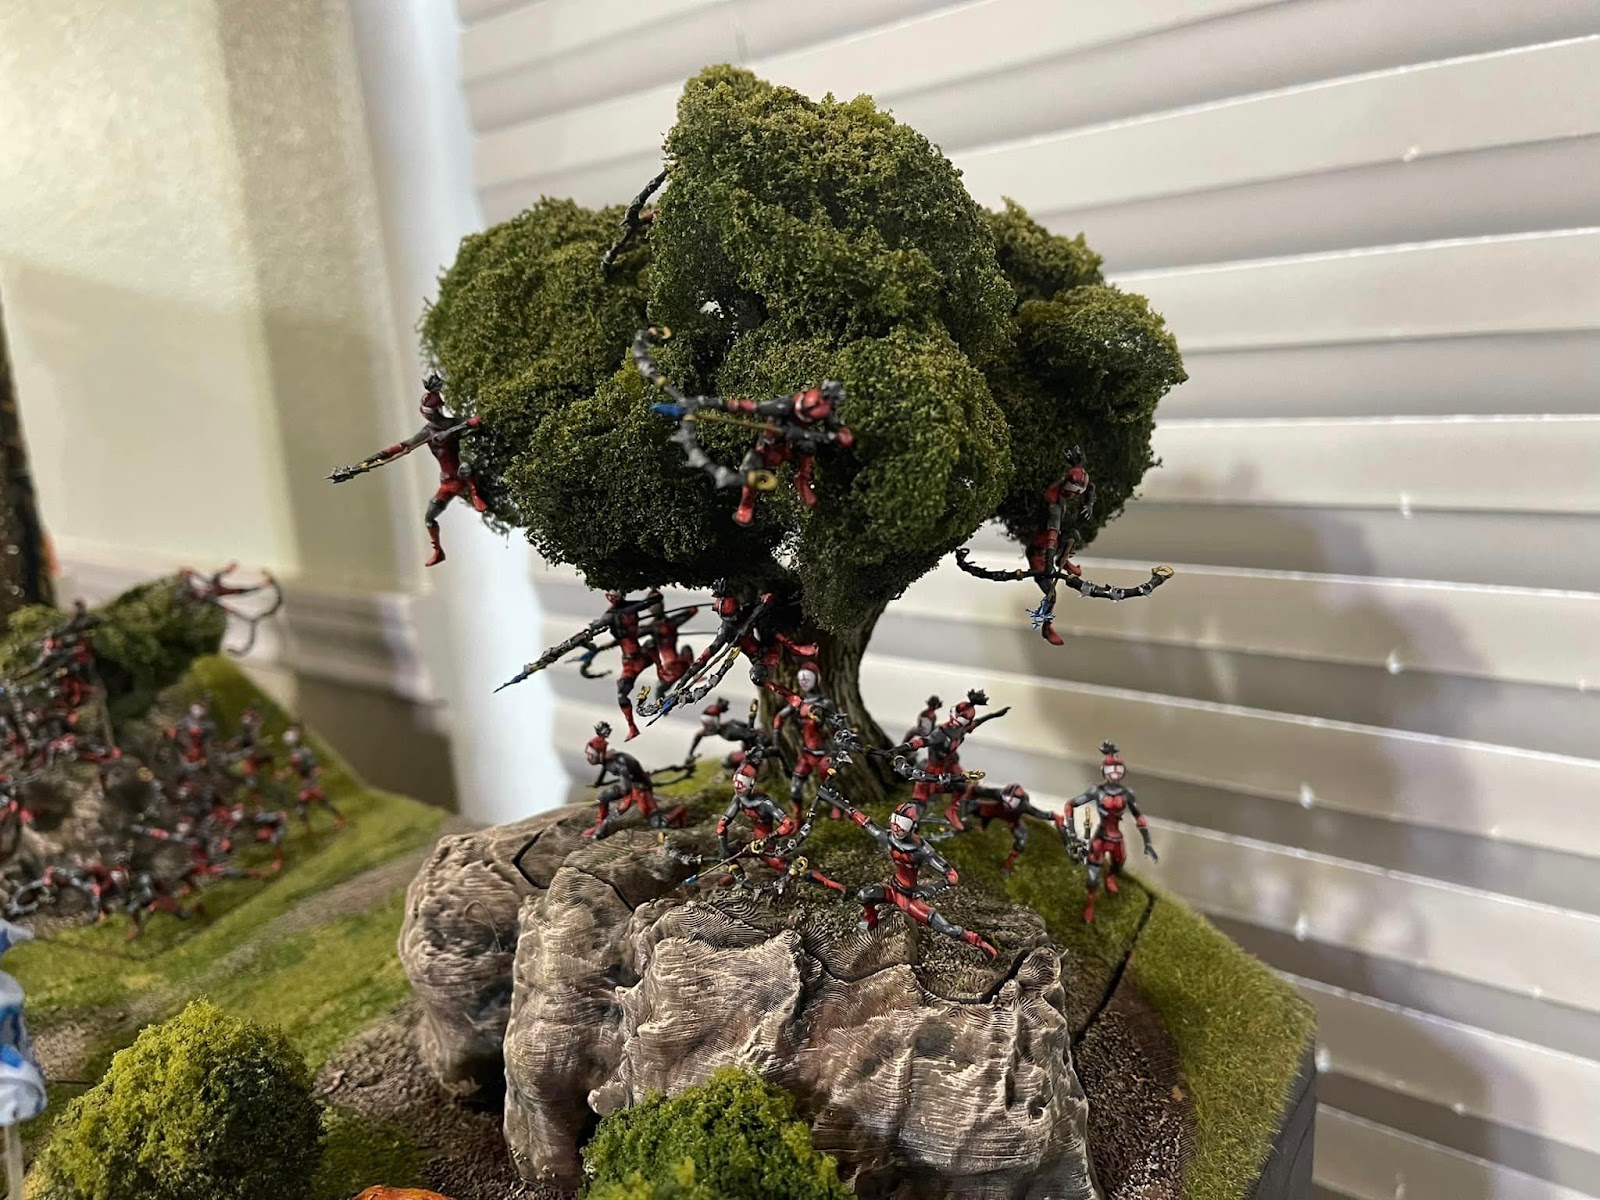 |
| A tree with Yiga perched in it |
The Shiekah Tower
The Shiekah tower is the only part that was 100% digitally sculpted by me without any leveraging game resources. There was no game resource that I could find for it (though I did find a mangled one from Smash Bros Ultimate that wasn't close enough to use).
The Tower that was printed for Lone Wolf was too spindly - the columns didn't have enough structural support, and it literally fell over onto the army after game 1 and broke apart.
 |
| The original spindly tower |
For the Masters, I redid the tower portion itself, doubling the thickness of the wall portions, and the columns themselves. The twisting rune-designs marching up the columns are all digital freehand - see if you can spot my kids' initials on some of them. The top of the tower has the same freehand, though I threw some brushwork on the flat portions on top because I couldn't quite get the sculpting tools to work with such a flat. large expanse.
For the light column in the middle, I sculpted a column of rocks in Blender, and printed them in transparent resin. I then painted over the majority of the transparency, leaving large gaps of clear resin visible. A strip of LEDs is run through the tower twice - up and down, and then up and down again - and twisted to spread the lights over as many angles as possible. The back of the base has a slide-out drawer that holds the battery pack and on/off switch for the lights. The column kind of rests in the tower loosely; it's secure enough that it can't fall and knock the tower over, but I don't have to worry about slotting narrow grooves together across a two foot height.
 |
| The new chonkier tower |
Showcase


